Text Editor by Python|MCA|PROJECT|REPORT
Project Content
Table of content
1.
INTRODUCTION
2.
SYSTEM ANALYSIS
3.
SYSTEM DESIGN
4.
S/W & H/W REQUIEMENT SPECIFICATION
5.
SCREEN SHOTS
6.
SYSTEM MODULES
7.
FUTURE SCOPE
8.
ALGORITHM
9.
DATA flow And ER diagram
10.
SOURCE CODE
11.
BIBLIOGRAPHY/REFERENCES
INTRODUCTION
Poly Text-Editor Gui for windows os.
Text Editor Application is an application where you can write
your text, open any text file, you can edit any text file and you can also save
a file if you want. In this tutorial, we will build a Text Editor Application
from scratch.
The Python interpreter and the extensive standard library are
freely available in source or binary form for all major platforms from the
Python Web site and may be freely distributed. The same site also contains
distributions of and pointers to many free third party Python modules, programs
and tools, and additional documentation.
The Python interpreter is easily extended with new functions and
data types implemented in C or C++ (or other languages callable from C). Python
is also suitable as an extension language for customizable applications.
This tutorial introduces the reader informally to the basic
concepts and features of the Python language and system. It helps to have a
Python interpreter handy for hands-on experience, but all examples
This tutorial does not attempt to be comprehensive and cover
every single feature, or even every commonly used feature. Instead, it
introduces many of Python’s most noteworthy features, and will give you a good
idea of the language’s flavor and style. After reading it, you will be able to
read and write Python modules and programs, and you will be ready to learn more
about the various Python library modules
Text Editor is the first most and essential need of a software
developer those are willing to write code or simply edit the existing one,
working becomes easier due to the different functionality provided to the user,
they are customizable according to the user needs. As though the ultimate work
of a text editor is to edit files then too, choosing the best editor for
programming is a trending topic of all-time in the tech industry, depending
upon you can predict the power and importance of text editor in developer’s
life.
So in this tutorial, we will be learning how to create a simple
text editor using Python Programming Language. In this, we will be using the
Tkinter library and two additional modules supported by Tkinter, ‘MessageBox’
and ‘FileDialog’ for providing some additional functionality to our editor.
SYSTEM
ANALYSIS
A text editor is a tool that
allows a user to create and revise documents in a computer.
Though this task can be carried out in other modes, the word text editor
commonly refers to the tool that does this interactively. Earlier computer
documents used to be primarily plain text documents, but nowadays due to
improved input-output mechanisms and file formats, a document frequently
contains pictures along with texts whose appearance (script, size, colour and
style) can be varied within the document. Apart from producing output of such
wide variety, text editors today provide many advanced features of
interactiveness and output.
Plain text vs. Rich text:
There
are important differences between plain text (created and edited by text
editors) and rich text (such as that created by word
processors or desktop publishing software).
Plain
text exclusively consists of character representation. Each character is
represented by a fixed-length sequence of one, two, or four bytes, or as a
variable-length sequence of one to four bytes, in accordance to
specific character encoding conventions, such
as ASCII, ISO/IEC 2022, UTF-8, or Unicode. These
conventions define many printable characters, but also non-printing
characters that control the flow of the text, such
as space, line break, and page break. Plain text contains no
other information about the text itself, not even the character encoding
convention employed. Plain text is stored in text files, although text
files do not exclusively store plain text. In the early days of computers,
plain text was displayed using a monospace font, such that horizontal
alignment and columnar formatting were sometimes done using whitespace
characters. For compatibility reasons, this tradition has not changed.
Rich
text, on the other hand, may contain metadata, character formatting data
(e.g. typeface, size, weight and style), paragraph formatting data (e.g.
indentation, alignment, letter and word distribution, and space between lines
or other paragraphs), and page specification data (e.g. size, margin and
reading direction). Rich text can be very complex. Rich text can be saved
in binary format (e.g. DOC), text files adhering to
a markup language (e.g. RTF or HTML), or in a hybrid
form of both (e.g. Office Open XML).
Tkinter Module in python
Tkinter is the standard
GUI library for Python. Python when combined with Tkinter provides a fast and
easy way to create GUI applications. Tkinter provides a powerful
object-oriented interface to the Tk GUI toolkit.
Creating a GUI
application using Tkinter is an easy task. All you need to do is perform the
following steps −
·
Import the Tkinter module.
·
Create the GUI
application main window.
·
Add one or more of the
above-mentioned widgets to the GUI application.
·
Enter the main event
loop to take action against each event triggered by the user.
Components of poly text
editor
|
Sr.No. |
Operator & Description |
|
1 |
The Button widget is used to display buttons in your
application. |
|
2 |
The Canvas widget is used to draw shapes, such as lines, ovals,
polygons and rectangles, in your application. |
|
3 |
The Checkbutton widget is used to display a number of options as
checkboxes. The user can select multiple options at a time. |
|
4 |
The Entry widget is used to display a single-line text field for
accepting values from a user. |
|
5 |
The Frame widget is used as a container widget to organize other
widgets. |
|
6 |
The Label widget is used to provide a single-line caption for
other widgets. It can also contain images. |
|
7 |
The Listbox widget is used to provide a list of options to a
user. |
|
8 |
The Menubutton widget is used to display menus in your
application. |
|
9 |
The Menu widget is used to provide various commands to a user.
These commands are contained inside Menubutton. |
|
10 |
The Message widget is used to display multiline text fields for
accepting values from a user. |
|
11 |
The Radiobutton widget is used to display a number of options as
radio buttons. The user can select only one option at a time. |
|
12 |
The Scale widget is used to provide a slider widget. |
|
13 |
The Scrollbar widget is used to add scrolling capability to
various widgets, such as list boxes. |
|
14 |
The Text widget is used to display text in multiple lines. |
|
15 |
The Toplevel widget is used to provide a separate window
container. |
|
16 |
The Spinbox widget is a variant of the standard Tkinter Entry
widget, which can be used to select from a fixed number of values. |
|
17 |
A PanedWindow is a container widget that may contain any number
of panes, arranged horizontally or vertically. |
|
18 |
A labelframe is a simple container widget. Its primary purpose
is to act as a spacer or container for complex window layouts. |
|
19 |
VIEW OF POLY
TEXT -EDITOR

Text
editor features such as :
1. Firstly, Functions
similar to any other plain text editors,
2. Secondly, Shows Line
Number,
3. Thirdly, Highlights
the current line,
4. Fourthly, Shows cursor
location at the bottom, and
5.
Fifth,Take Screen short while working.
6. Sixth,
Open,close,create and edit files.
7. seventh, Spelling
checker, highlight wrong text.
8. eight, Send through
mail the content.
9.last, close button
S/W & H/W REQUIREMENT
There is some
important software requirements are as follow
Python
idle:-IDLE (Integrated
Development and Learning Environment) is an integrated development environment
(IDE) for Python. The Python installer for Windows contains the IDLE module by
default.
IDLE is not available by default in Python
distributions for Linux. It needs to be installed using the respective package
managers. Execute the following command to install IDLE on Ubuntu:
$ sudo
apt-get install idle
IDLE can be used to execute a single
statement just like Python Shell and also to create, modify, and execute Python
scripts. IDLE provides a fully-featured text editor to create Python script
that includes features like syntax highlighting, autocompletion, and smart
indent. It also has a debugger with stepping and breakpoints features.
To start an IDLE interactive shell, search
for the IDLE icon in the start menu and double click on it.
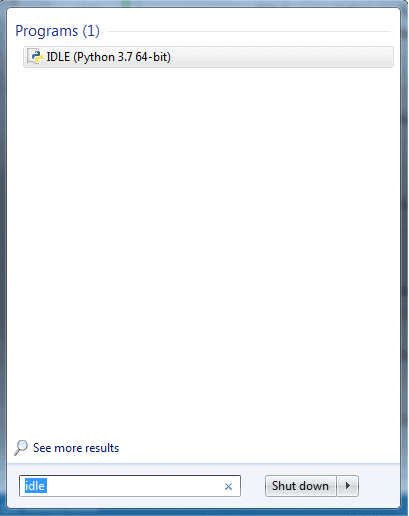 Python IDLE
This will open IDLE, where you can write
and execute the Python scripts, as shown below.
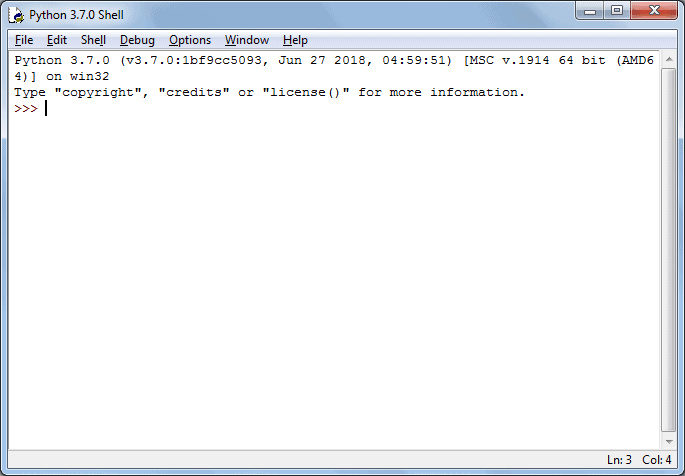 Python IDLE
You can execute Python statements same as
in Python
Shell as shown below.
 Python IDLE
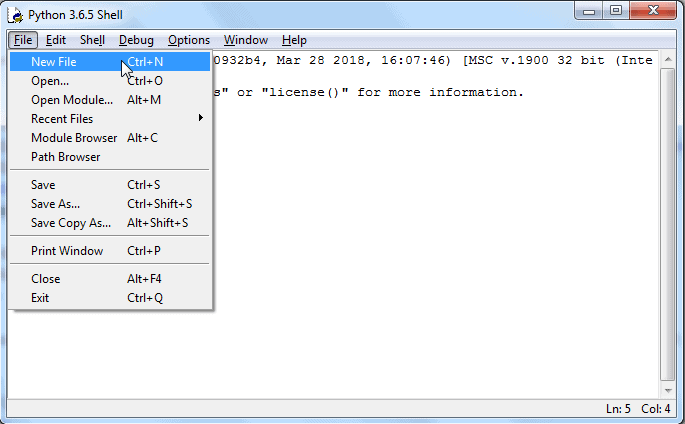
To execute a Python script, create a new file
by selecting File -> New File from the menu.
HARDWARE REQUIREMENT
There are
some importatant hardware requirements
are
- System, like computer and laptop is modt for this .
without any system we can’t run our code
SYSTEM DESIGN
Given
below steps follows the guide to create a GUI applications using Tkinter GUI
toolkit :
1.
Firstly,
Install Tkinter package and Import Tkinter library.
2.
Secondly,
Create main application window for GUI.
3.
Thirdly,
Add required widgets to GUI.
4.
Add Frames,Text box,Buttons,etc.
Lastly, Enter event loop
to trigger action against every specified event.
The
structure of a text editor depends largely on the types of editing features and
displaying capabilities that are to be supported. To implement the diplaying
capabilities, the semantics of the meta data that may be present in the
document file needs to be implemented as display actions. For example, if the
meta data implies a particular colour to be used for a segment of text, editor
should invoke methods to effect that colour for the particular segment of text.
Since at a time only a finite portion of the document can be displayed, such
actions are to be taken for a portion of the information in the file. However,
the user may specify some other portion to be displayed (through page-up,
page-down, pattern search, etc.), in which case the display actions must be
performed for that portion. Thus the editor program should keep track of the
size of the display window, and the boundaries of the current displayed portion
in terms of offsets from some fixed point in the document (such as line number
of the first and the last displayed lines, etc.)
It is not enough
to directly produce the display of a document page from the information in the
file. The user provides different editing inputs which implies changes in the
displayed information as well as the document file. For this, firstly, the
editor should keep track of the cursor position with respect to the displayed
information. Then, one possible way to effect the changes is to update the
document file for each insertion, deletion or modification input, and then
redraw the page on the monitor according to the changed content. But this is a
very inefficient method. Instead, text editors maintain a memory image of
the document, and pages are displayed from this memory image rather than from
the document file. In fact, when a document is being created, a corresponding
file in the secondary storage may not exist at all. All updations in the
document due to editing inputs from the user are effected in the memory image
maintained in suitable buffers.
The choice
of data structure for the memory image (buffers) is important, since
it has to support efficient insertion and deletion, while allowing
the size of the document to vary from small to very large. A simple
2-dimensional array wih each row containing a line of text, may not suit for
obvious reasons (what are the reasons ?). A linked list may facilitate easy
insertion and deletion, but having each letter in a single node in the linked
list may be wasteful of memory. Also, user commands such as page-up, page-down,
etc., may become inefficient. Thus some kind of combination of array and linked
list may have to be used. For example, the entries of an array may point to
individual buffers for each line of the document. The buffer for a line may
either be arrays or linked lists (with, say, a word in each node). For very
large documents it may not be a good idea to hold the entire document in such
buffers since only a small portion is displayed at a time and editing
operations for a reasonable duration are likely to be in the neighbourhood of
the displayed portion. In such situations, a text editor may load only the
required portion of the document into memory buffers, but be able to load any
other portion as and when required. It needs to be remembered that in the
memory image too it is essential to represent the meta data corresponding to
the different portions of the document.
By making use of
the hardware features of the display terminals, it is possible to avoid
redrawing the entire screen for each editing input from the user. For example,
when a character is inserted in a line, only the portion to the right of that
position needs to be shifted. Similarly, when a line is inserted or deleted,
only the lines below that line are to be shifted. The terminals provide easy
alternatives for such actions. Moreover, modern terminals provide more advanced
buffering mechanisms such that the software may only have to update the display
buffers. Since the hardware features vary from one product to another,
there are certain software standards and conversion libraries (for each kind of
terminal) using which the editor program may behave in hardware independent way
(See termcap and terminfo man pages in
Unix/Linux).
SCREEN SHOT
Some views of
gui looking
While writing
and reading view

- Open the saved file from file manager.

- After write or paste text on text box we calculate
the how may alphabets are therein whole text
- Without space

With spacing

- After writing the text we save it by just 1 click.
s

SYSTEM MODULES
There are
some important python modules are very use full for making this GUI
- Tkinter
- Pyautogui
- Webbrowser
Tkinter:- Python has a lot of GUI frameworks,
but Tkinter is
the only framework that’s built into the Python standard library. Tkinter has
several strengths. It’s cross-platform,
so the same code works on Windows, macOS, and Linux. Visual elements are rendered
using native operating system elements, so applications built with Tkinter look
like they belong on the platform where they’re run
>>> importtkinterastk
A window is an instance of Tkinter’s Tk class. Go ahead
and create a new window and assign it to the variable window:
>>>
>>> window=tk.Tk()
When you execute the above code, a new window pops up on your
screen. How it looks depends on your operating system:
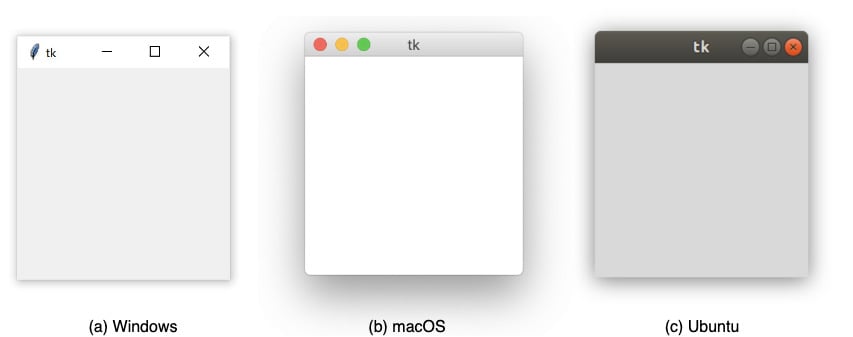
Throughout the rest of this tutorial, you’ll see Windows
screenshots.
Working With Widgets
Widgets are the bread and butter of the Python GUI framework
Tkinter. They are the elements through which users interact with your program.
Each widget in Tkinter is defined by a class. Here are some of the
widgets available:
|
Widget Class |
Description |
|
|
A
widget used to display text on the screen |
|
|
A
button that can contain text and can perform an action when clicked |
|
|
A
text entry widget that allows only a single line of text |
|
|
A
text entry widget that allows multiline text entry |
|
|
A
rectangular region used to group related widgets or provide padding between
widgets |
Pyautogui:
Introduction
In this
tutorial, we're going to learn how to use pyautogui library
in Python 3. The PyAutoGUI library provides cross-platform support
for managing mouse and keyboard operations through code to enable automation of
tasks. The pyautogui library is also available for Python 2; however,
we will be using Python 3 throughout the course of this tutorial.
A tool like
this has many applications, a few of which include taking screenshots,
automating GUI testing (like Selenium), automating tasks that can only be
done with a GUI, etc.
Before you go
ahead with this tutorial, please note that there are a few prerequisites. You
should have a basic understanding of Python's syntax, and/or have done at least
beginner level programming in some other language. Other than that, the
tutorial is quite simple and easy to follow for beginners.
Installation
The
installation process for PyAutoGUI is fairly simple for all Operating
Systems. However, there are a few dependencies for Mac and Linux that need to
be installed before the PyAutoGUI library can be installed and used
in programs.
Windows
For
Windows, PyAutoGUI has no dependencies. Simply run the following command
in your command prompt and the installation will be done.
$ pip install
PyAutoGUI
$ pip3
install pyautogui
Common
Mouse Operations
In this
section, we are going to cover PyAutoGUI functions for mouse
manipulation, which includes both moving the position of the cursor as well as
clicking buttons automatically through code.
The
moveTo() Function
The syntax of
the moveTo() function is as follows:
pag.moveTo(x_coordinate,
y_coordinate)
The value
of x_coordinate increases from left to right on the screen, and the
value of y_coordinate increases from top to bottom. The value of
both x_coordinate and y_coordinate at the top left corner
of the screen is 0.
Look at the
following script:
pag.moveTo(0,
0)
pag.PAUSE = 2
pag.moveTo(100,
500) #
pag.PAUSE = 2
pag.moveTo(500,
500)
In the code
above, the main focus is the moveTo() function that moves the mouse
cursor on the screen based on the coordinates we provide as parameters. The
first parameter is the x-coordinate and the second parameter is the
y-coordinate. It is important to note that these coordinates represent the
absolute position of the cursor.
One more
thing that has been introduced in the code above is
the PAUSE property; it basically pauses the execution of the script
for the given amount of time. The PAUSE property has been added in
the above code so that you can see the function execution; otherwise, the
functions would execute in a split second and you wont be able to actually see
the cursor moving from one location to the other on the screen.
Another workaround
for this would be to indicate the time for each moveTo() operation as
the third parameter in the function, e.g. moveTo(x, y, time_in_seconds).
Executing the
above script may result in the following error:
Note:
Possible Error
Traceback
(most recent call last):
File "a.py", line 5, in
<module>
pag.moveTo (100, 500)
File
"/anaconda3/lib/python3.6/site-packages/pyautogui/__init__.py", line
811, in moveTo
_failSafeCheck()
File
"/anaconda3/lib/python3.6/site-packages/pyautogui/__init__.py", line
1241, in _failSafeCheck
raise FailSafeException ('PyAutoGUI
fail-safe triggered from mouse moving to a corner of the screen. To disable
this fail-safe, set pyautogui.FAILSAFE to False. DISABLING FAIL-SAFE IS NOT
RECOMMENDED.')
pyautogui.FailSafeException:
PyAutoGUI fail-safe triggered from mouse moving to a corner of the screen. To
disable this fail-safe, set pyautogui.FAILSAFE to False. DISABLING FAIL-SAFE IS
NOT RECOMMENDED.
If the
execution of the moveTo() function generates an error similar to the
one shown above, it means that your computer's fail-safe is enabled. To disable
the fail-safe, add the following line at the start of your code:
pag.FAILSAFE
= False
This feature
is enabled by default so that you can easily stop execution of your pyautogui program
by manually moving the mouse to the upper left corner of the screen. Once the
mouse is in this location, pyautogui will throw an exception and
exit.
The
moveRel() Function
The
coordinates of the moveTo() function are absolute. However, if you
want to move the mouse position relative to the current mouse position, you can
use the moveRel() function.
What this
means is that the reference point for this function, when moving the cursor,
would not be the top left point on the screen (0, 0), but the current position
of the mouse cursor. So, if your mouse cursor is currently at point (100, 100)
on the screen and you call the moveRel() function with the
parameters (100, 100, 2) the new position of your move cursor would
be (200, 200).
You can use
the moveRel() function as shown below:
pag.moveRel(100,
100, 2)
The above
script will move the cursor 100 points to the right and 100 points down in 2
seconds, with respect to the current cursor position.
.
The
hotkey() Function
If you
haven't noticed this so far, the keys we've shown above have no mention for
combined operations like Control + C for the copy command. In case
you're thinking you could do that by passing the list ['ctrl',
'c'] to the typewrite() function, you are wrong.
The typewrite() function would press both those buttons in a
sequence, not simultaneously. And as you probably already
know, to execute the copy command, you need to press the C key while
holding the ctrl key.
To press two
or more keys simultaneously, you can use the hotkey() function, as
shown here:
pag.hotkey('shift',
'enter')
pag.hotkey('ctrl',
'2' ) # For the @ symbol
pag.hotkey('ctrl',
'c') # For the copy command
The
screenshot() Function
If you would
like to take a screenshot of the screen at any instance, the screenshot() function
is the one you are looking for. Let's see how we can implement that
using PyAutoGUI:
scree_shot =
pag.screenshot() # to store a PIL object containing the image in a variable
This will
store a PIL object containing the image in a
variable.
If, however,
you want to store the screenshot directly to your computer, you can call
the screenshot function like this instead:
pag.screenshot('ss.png')
This will
save the screenshot in a file, with the filename given, on your computer.
The
confirm(), alert(), and prompt() Functions
The last set
of functions that we are going to cover in this tutorial are the message box
functions. Here is a list of the message box functions available in PyAutoGUI:
- Confirmation Box: Displays
information and gives you two options i.e. OK and Cancel
- Alert Box: Displays some
information and to acknowledge that you have read it. It displays a single
button i.e. OK
- Prompt Box: Requests some
information from the user, and upon entering, the user has to click
the OK button
Now that we
have seen the types, let's see how we can display these buttons on the screen
in the same sequence as above:
pag.confirm("Are
you ready?")
pag.alert("The
program has crashed!")
pag.prompt("Please
enter your name: ")
Webbrowser
The webbrowser module
provides a high-level interface to allow displaying Web-based documents to
users. Under most circumstances, simply calling the open() function from this
module will do the right thing.
Under Unix, graphical
browsers are preferred under X11, but text-mode browsers will be used if
graphical browsers are not available or an X11 display isn’t available. If
text-mode browsers are used, the calling process will block until the user
exits the browser.
If the environment
variable BROWSER exists, it is interpreted as the os.pathsep-separated
list of browsers to try ahead of the platform defaults. When the value of a
list part contains the string %s, then it is interpreted
as a literal browser command line to be used with the argument URL substituted
for %s; if the part does not contain %s, it is simply interpreted as the name of the browser to
launch. 1
For non-Unix platforms,
or when a remote browser is available on Unix, the controlling process will not
wait for the user to finish with the browser, but allow the remote browser to
maintain its own windows on the display. If remote browsers are not available
on Unix, the controlling process will launch a new browser and wait.
The script webbrowser can be used as a
command-line interface for the module. It accepts a URL as the argument. It
accepts the following optional parameters: -n opens the URL in a
new browser window, if possible; -t opens the URL in a
new browser page (“tab”). The options are, naturally, mutually exclusive. Usage
example:
python -m webbrowser -t "https://www.python.org"
The following exception
is defined:
exception webbrowser.Error
Exception raised when a browser control
error occurs.
The
following functions are defined:
webbrowser.open(url, new=0, autoraise=True)
Display url using the default browser. If new is 0, the url is opened in the
same browser window if possible. If new is
1, a new browser window is opened if possible. If new is 2, a new
browser page (“tab”) is opened if possible. If autoraise is True, the window is raised if possible (note that under many window
managers this will occur regardless of the setting of this variable).
Note that
on some platforms, trying to open a filename using this function, may work and
start the operating system’s associated program. However, this is neither
supported nor portable.
Raises an auditing event webbrowser.open with
argument url.
webbrowser.open_new(url)
Open url in a new window of the default
browser, if possible, otherwise, open url in
the only browser window.
webbrowser.open_new_tab(url)
Open url in a new page (“tab”) of the default
browser, if possible, otherwise equivalent to open_new().
webbrowser.get(using=None)
Return a controller object for the browser
type using.
If using is None, return a controller for a default browser appropriate to the
caller’s environment.
webbrowser.register(name, constructor, instance=None, *, preferred=False)
Register the browser type name. Once a browser type
is registered, the get() function can
return a controller for that browser type. If instance is not provided, or is None, constructor will
be called without parameters to create an instance when needed. If instance is
provided, constructor will
never be called, and may be None.
Setting preferred to True makes this browser a preferred result for a get() call with no
argument. Otherwise, this entry point is only useful if you plan to either set
the BROWSER variable or call get() with a nonempty
argument matching the name of a handler you declare.
Changed in version 3.7: preferred keyword-only
parameter was added.
A number of
browser types are predefined. This table gives the type names that may be
passed to the get() function and the
corresponding instantiations for the controller classes, all defined in this
module.
|
Type
Name |
Class
Name |
Notes |
|
'mozilla' |
Mozilla('mozilla') |
|
|
'firefox' |
Mozilla('mozilla') |
|
|
'netscape' |
Mozilla('netscape') |
|
|
'galeon' |
Galeon('galeon') |
|
|
'epiphany' |
Galeon('epiphany') |
|
|
'skipstone' |
BackgroundBrowser('skipstone') |
|
|
'kfmclient' |
Konqueror() |
(1) |
|
'konqueror' |
Konqueror() |
(1) |
|
'kfm' |
Konqueror() |
(1) |
|
'mosaic' |
BackgroundBrowser('mosaic') |
|
|
'opera' |
Opera() |
|
|
'grail' |
Grail() |
|
|
'links' |
GenericBrowser('links') |
|
|
'elinks' |
Elinks('elinks') |
|
|
'lynx' |
GenericBrowser('lynx') |
|
|
'w3m' |
GenericBrowser('w3m') |
|
|
'windows-default' |
WindowsDefault |
(2) |
|
'macosx' |
MacOSX('default') |
(3) |
|
'safari' |
MacOSX('safari') |
(3) |
|
'google-chrome' |
Chrome('google-chrome') |
|
|
'chrome' |
Chrome('chrome') |
|
|
'chromium' |
Chromium('chromium') |
|
|
'chromium-browser' |
Chromium('chromium-browser') |
FUTURE SCOOP
Typical Features:
·
Find and Replace – Text editors provide extensive facilities for searching
and replacing text, either on groups of files or interactively. Advanced
editors can use regular expressions to search and edit text or code.
·
Cut, Copy and Paste – most text editors provide methods to duplicate and move
text within the file, or between files.
·
Ability to
handle UTF-8 encoded text.
·
Text Formatting – Text editors often provide basic visual formatting
features like line wrap, auto-indentation, bullet
list formatting using ASCII characters, comment
formatting, syntax highlighting and so on. These are typically only
for display and do not insert formatting codes into the file itself.
·
Undo and Redo – As with word processors, text editors provide a way to
undo and redo the last edit, or more. Often—especially with older text
editors—there is only one level of edit history remembered and successively
issuing the undo command will only "toggle" the last change. Modern
or more complex editors usually provide a multiple-level history such that
issuing the undo command repeatedly will revert the document to successively
older edits. A separate redo command will cycle the edits "forward" toward
the most recent changes. The number of changes remembered depends upon the
editor and is often configurable by the user.
Advanced Features:
·
Macro or procedure
definition: to define new commands or features as combinations of prior
commands or other macros, perhaps with passed parameters, or with nesting of
macros.
·
Profiles to retain
options set by the user between editing session.
·
Profile macros with
names specified in, e.g., environment, profile, executed automatically at the
beginning of an edit session or when opening a new file.
·
Multi-file editing:
the ability to edit multiple files during an edit-session, perhaps remembering
the current-line cursor of each file, to insert repeated text into each file,
copy or move text among files, compare files side-by-side (perhaps
with a tiled multiple-document interface), etc.
·
Multi-view editors:
the ability to display multiple views of the same file, with independent cursor
tracking, synchronizing changes among the windows but providing the same
facilities as are available for independent files.
·
Collapse/expand, also
called folding: The ability to temporarily exclude sections of the text
from view. This may either be based on a range of line numbers or on some
syntactic element, e.g., excluding everything between a BEGIN; and the
matching END;.
·
Column-based editing;
the ability to alter or insert data at a particular column, or to shift data to
specific columns.
·
Data
transformation – Reading or merging the contents of another text file into
the file currently being edited. Some text editors provide a way to insert the
output of a command issued to the operating system's shell. Also, a
case-shifting feature could translate to lowercase or uppercase.
·
Filtering – Some
advanced text editors allow the editor to send all or sections of the file
being edited to another utility and read the result back into the file in place
of the lines being "filtered". This, for example, is useful for
sorting a series of lines alphabetically or numerically, doing mathematical
computations, indenting source code, and so on.
·
Syntax
highlighting – contextually highlights source code, markup
languages, config files and other text that appears in an organized
or predictable format. Editors generally allow users to customize the colors or
styles used for each language element. Some text editors also allow users to
install and use themes to change the look and feel of the
editor's entire user interface.
·
Extensibility - a
text editor intended for use by programmers must provide
some plugin mechanism, or be scriptable, so a programmer can
customize the editor with features needed to manage individual software
projects, customize functionality or key bindings for
specific programming languages or version control systems,
or conform to specific coding styles.
Specialised editors:
Some editors include
special features and extra functions, for instance,
·
Source code
editors are text editors with additional functionality to facilitate the
production of source code. These often feature user-programmable syntax
highlighting and code navigation functions as well as coding tools or
keyboard macros similar to an HTML editor.
·
Folding editors. This
subclass includes so-called "orthodox editors" that are derivatives
of Xedit. Editors that implement folding without programing-specific features
are usually called outliners (see below).
·
IDEs (integrated
development environments) are designed to manage and streamline large
programming projects. They are usually only used for programming as they
contain many features unnecessary for simple text editing.
·
World Wide
Web authors are offered a variety of HTML editors dedicated to
the task of creating web pages. These
include: Dreamweaver, KompoZer and E Text Editor. Many
offer the option of viewing a work in progress on a built-in HTML
rendering engine or standard web browser.
Most web development is done in
a dynamic programming language such
as Ruby or PHP using a source code editor or IDE. The HTML
delivered by all but the simplest static web sites is stored as
individual template files that are assembled by the software
controlling the site and do not compose a complete HTML document
ORIGINAL COPY OF
APPROVED SYNOPSIS
Introduction
Text editor Gui
for windows os.
Text Editor Application is an application where you can write
your text, open any text file, you can edit any text file and you can also save
a file if you want. In this tutorial, we will build a Text Editor Application
from scratch.
The Python interpreter and the extensive standard library are
freely available in source or binary form for all major platforms from the
Python Web site and may be freely distributed. The same site also contains
distributions of and pointers to many free third party Python modules, programs
and tools, and additional documentation.
The Python interpreter is easily extended with new functions and
data types implemented in C or C++ (or other languages callable from C). Python
is also suitable as an extension language for customizable applications.
This tutorial introduces the reader informally to the basic
concepts and features of the Python language and system. It helps to have a
Python interpreter handy for hands-on experience, but all examples
This tutorial does not attempt to be comprehensive and cover
every single feature, or even every commonly used feature. Instead, it
introduces many of Python’s most noteworthy features, and will give you a good
idea of the language’s flavor and style. After reading it, you will be able to
read and write Python modules and programs, and you will be ready to learn more
about the various Python library modules
Tkinter Module (Python GUI Module )
Tkinter is the standard
GUI library for Python. Python when combined with Tkinter provides a fast and
easy way to create GUI applications. Tkinter provides a powerful
object-oriented interface to the Tk GUI toolkit.
Creating a GUI
application using Tkinter is an easy task. All you need to do is perform the
following steps −
·
Import the Tkinter module.
·
Create the GUI
application main window.
·
Add one or more of the
above-mentioned widgets to the GUI application.
·
Enter the main event
loop to take action against each event triggered by the user.
|
Sr.No. |
Operator & Description |
|
1 |
The Button widget is used to display buttons in your
application. |
|
2 |
The Canvas widget is used to draw shapes, such as lines, ovals,
polygons and rectangles, in your application. |
|
3 |
The Checkbutton widget is used to display a number of options as
checkboxes. The user can select multiple options at a time. |
|
4 |
The Entry widget is used to display a single-line text field for
accepting values from a user. |
|
5 |
The Frame widget is used as a container widget to organize other
widgets. |
|
6 |
The Label widget is used to provide a single-line caption for
other widgets. It can also contain images. |
|
7 |
The Listbox widget is used to provide a list of options to a
user. |
|
8 |
The Menubutton widget is used to display menus in your
application. |
|
9 |
The Menu widget is used to provide various commands to a user.
These commands are contained inside Menubutton. |
|
10 |
The Message widget is used to display multiline text fields for
accepting values from a user. |
|
11 |
The Radiobutton widget is used to display a number of options as
radio buttons. The user can select only one option at a time. |
|
12 |
The Scale widget is used to provide a slider widget. |
|
13 |
The Scrollbar widget is used to add scrolling capability to
various widgets, such as list boxes. |
|
14 |
The Text widget is used to display text in multiple lines. |
|
15 |
The Toplevel widget is used to provide a separate window
container. |
|
16 |
The Spinbox widget is a variant of the standard Tkinter Entry
widget, which can be used to select from a fixed number of values. |
|
17 |
A PanedWindow is a container widget that may contain any number
of panes, arranged horizontally or vertically. |
|
18 |
A labelframe is a simple container widget. Its primary purpose
is to act as a spacer or container for complex window layouts. |
|
19 |
SYSTEM ANALYSIS
ABOUT
PROJECT
ADVANCE TEXT
EDITOR GUI

Text
editor features such as :
1. Firstly, Functions
similar to any other plain text editors,
2. Secondly, Shows Line
Number,
3. Thirdly, Highlights
the current line,
4. Fourthly, Shows cursor
location at the bottom, and
5.
Fifth,Take Screen short while working.
6. Sixth,
Open,close,create and edit files.
7. seventh, Spelling
checker, highlight wrong text.
8. eight, Send through
mail the content.
9.last, close button
SYSTEM DESIGN
Given
below steps follows the guide to create a GUI applications using Tkinter GUI
toolkit :
5.
Firstly,
Install Tkinter package and Import Tkinter library.
6.
Secondly,
Create main application window for GUI.
7.
Thirdly,
Add required widgets to GUI.
8.
Add Frames,Text box,Buttons,etc.
9.
Lastly,
Enter event loop to trigger action against every specified event.
File
handling in Tkinter
To open and save files ,
the project is using Python file handling system and its basic method.The text
editor offers functionalities like open,close ,edit and create new files using
Python.
GUI
The user interface is
developed using tkinter components:
1. Firstly,Top Frame,with
search box and about button.
2. Secondly,Side frame
with Menu list and Word counter.
3. Thirdly, Text Box to
write and Edit file.
4. Lastly, Bottom Frame
with save and send Button, Mainloop
Workflow:
1. Firstly, Make a simple
GUI through Python tkinter interface.
2. Secondly, Add a input
box for the text editor files.
3. Thirdly, Add file
handling functionalities for the text files that you create. For instance,
open, close, edit a existing file and create a new file.
4. Fourthly, Add icons or
menus for this file handling options.
5. Lastly, Make a
interface to view line number and column number of the current cursor position.
Image samples for the program:
Essential Elements
for the Text editor application are as follows:
·
There is a Button widget called btn_open that is used for opening a file for editing
·
Second one is a Button widget called btn_save for saving a file
·
Third, there is a Text widget called txt_edit for creating and editing any text file.
The arrangement of three widgets is done in a way such that the
two buttons are on the left-hand side of the window, and the text box is on the
right-hand side. The minimum height of the whole window should be 900 pixels
and txt_edit should have a minimum width of 900 pixels. And The whole
layout should be responsive if the window is resized, then txt_edit is resized as well. The width of the Frame that holds the buttons should not change.
SYSTEM MODULS
·
Tkinter
·
Pyautogui
·
Webbrowser
·
Os module
Future
use
It
is an easy text modifier Text Editior Gui which we easily install in your
window Os . We easily save,open evenly send that text to other through the help
of mail. Some time while working we want to take screen short of that
particular text then we easily take it by single click on take screen short
button. In future we use it as light waited mean enough memory consumption
application.
ALGORITHM
/FLOWCHART
Alogo

ER-DAIGRAM

Source code
from tkinter
import *
import
pyautogui
import
tkinter.font as font
from tkinter
import filedialog
from
tkinter.filedialog import askopenfilename, asksaveasfilename
import
webbrowser
def
searchGo():
url=entryGo.get()
webbrowser.open(url)
def
takeScreenshot ():
myScreenshot = pyautogui.screenshot()
file_path =
filedialog.asksaveasfilename(defaultextension='.png')
myScreenshot.save(file_path)
def
send_message():
address_info = address.get()
email_body_info = email_body.get()
print(address_info,email_body_info)
sender_email =
"meashusir0562@gmail.com"
sender_password = "Ashu1995@"
server = smtplib.SMTP('smtp.gmail.com',587)
server.starttls()
server.login(sender_email,sender_password)
print("Login successful")
server.sendmail(sender_email,address_info,email_body_info)
print("Message sent")
reciver_email.delete(0,END)
textBox.delete(0,END)
def
__init__(self, parent= None):
Frame.__init__(self, parent)
self.parent = parent
self.initUI()
def client_exit():
exit()
def
upload(event=None):
file_path=askopenfile(mode='r',filetypes=[('Pdf Files','*pdf')])
def About():
print("it is eductional app which tell
us about trees")
# open saved
file
def open_file():
"""Open a file for
editing."""
filepath = askopenfilename(
filetypes=[("Text Files",
"*.txt"), ("All Files", "*.*")]
)
if not filepath:
return
textBox.delete(1.0, END)
with open(filepath, "r") as
input_file:
text = input_file.read()
textBox.insert(END, text)
root.title(f"Text Editor Application -
{filepath}")
#saved new or
edit file
def
save_file():
"""Save the current file as
a new file."""
filepath = asksaveasfilename(
defaultextension="txt",
filetypes=[("Text Files",
"*.txt"), ("All Files", "*.*")],
)
if not filepath:
return
with open(filepath, "w") as
output_file:
text = textBox.get(1.0, END)
output_file.write(text)
root.title(f"Text Editor Application -
{filepath}")
#textWordcounterFunction
def
charcount():
output.delete(0.0,"end")
w=textBox.get(0.0,"end")
sp=decision.get()
c=0
#specifying
conditions
if sp==1:
for k in w:
if k=="\n":
continue
c=c+1
elif sp==2:
for k in w:
if k==" " or
k=="\n":
continue
c=c+1
output.insert(INSERT,c)
# python main
program
root=Tk()
root.title("StepForTree")
root.geometry("400x400")
# frames
f1=Frame(root,bg="#7EC4BD",borderwidth=10,relief=RIDGE,
height=200)
f2=Frame(root,bg="#7EC4BD",borderwidth=6,relief=FLAT)
f3=Frame(root,bg="#7EC4BD",borderwidth=6,relief=GROOVE,
width=25)
# labels
label1=Label(f1,text="Welcome
to Vrindavan\n Save Trees & save Life", bg="#20D1D4",
fg="white",padx=50,pady=25,font=(50))
label3=Label(f3,text="Index
contain")
f1.pack(side=TOP,
fill="x",anchor="n")
f2.pack(side=BOTTOM,fill="x")
f3.pack(side=LEFT,
fill="y")
label1.pack()
label3.pack(side=TOP,
fill="x")
textBox=Text(root,height=35,width=150,wrap="word")
decision=IntVar()
output=Text(f3,width=20,height=1,font=("Helvetica",10),wrap="word")
textBox.pack()
output.pack(side=BOTTOM)
r1=Radiobutton(f3,text="with
spaces",value=1,variable=decision)
r2=Radiobutton(f3,text="without
spaces",value=2,variable=decision)
r1.pack(side=BOTTOM,fill="x")
r2.pack(side=BOTTOM,fill="x")
button_save=Button(f2,text="Save",command=save_file)
button_save.grid(row=0,column=0,sticky=W)
button_send=Button(f2,text="Send",command=send_message)
button_send.grid(row=0,column=2,sticky=W)
reciver_email=Text(f2,width='20',height='1')
reciver_email.grid(row=0,column=1)
search=Label(f1,text="SEARCH")
search.pack(side=LEFT)
searchvalue=StringVar()
entryGo=Entry(f1,textvariable=searchvalue)
entryGo.pack(side=LEFT)
b1=Button(f3,
fg="blue",font=('arial',10,'bold'),bg="white",text="PROJECT",padx="50",width=5,activebackground='green')
b1.pack(side=TOP)
b2=Button(f3,
fg="blue",font=('arial',10,'bold'),bg="white",
text="OPEN",
padx="50",command=open_file,width=5,activebackground='green')
b2.pack(side=TOP)
b3=Button(f3,
fg="blue",font=('arial',10,'bold'),bg="white",
text="SCREEN
SHORT",padx="50",command=takeScreenshot,width=5,activebackground='green')
b3.pack(side=TOP)
b4=Button(f3,
fg="blue",font=('arial',10,'bold'),bg="white",
text="ADD",padx="50",width=5,activebackground='green')
b4.pack(side=TOP)
b5=Button(f3,
fg="blue",font=('arial',10,'bold'),bg="white",text="TEXT
COUNT",padx="50",width=5,activebackground='green',command=charcount)
b5.pack(side=TOP)
cbtn =
Button(f3,font=('arial',10,'bold'),text="CLOSE",padx="50",width=5,activebackground='green',command=
client_exit)
cbtn.pack()
button_go=Button(f1,
fg="green", text="Go",command=searchGo,activebackground='green')
button_go.pack(side=LEFT)
root.mainloop()
Comments
Post a Comment